Bridged Host-VM Network
Bridged Host-VM Network
Host OS: |
Red Hat Enterprise Linux 7.5, may also work on other RHEL-based variants |
Host Virtual Platform: |
virt-manager, virsh, libvirt, qemu |
Guest OS: |
Any |
Setup a bridged network connection on RHEL 7.5 using Network Manager so that a VM can reside on the same network as the host.
e.g.
host 192.168.1.10
vm1 192.168.1.20
vm2 192.168.1.21
… vm1 and vm2 will use the bridge from the host to reach the DHCP server 192.168.1.1
I had figured this out before on previous versions of RHEL, but after doing an update to 7.5 my network connections got reset. Alas, after much trial and error wasted time, I decided to write down the process this time. I am not a network technician, but usually I remember enough from time to time when I need to set up something particular like this. This time, I needed help.
After writing up these instructions, I found a great video tutorial of similar work. Here are two videos demonstrating this gist of this tutorial in fedora, from another author. I think the GUIs may have changed just slightly since the 7.5 release, but otherwise this is still good stuff. You might find watching this first useful.
Before we begin
First, do not use network to manage your network behavior. That is the old way of things.
A lot of old tutorials are still out there claiming you need to use network to make virt-manager
or virsh or libvirt happy. It’s not true anymore. Use NetworkManager instead to manage
your network behavior. If you don’t know the difference between these two tools, go research it.
Second, the same tutorials frequently suggest using the "Virtual Network Connections" feature of
virt-manager. Do NOT attempt to use this. It simply doesn’t work with NetworkManager. In
fact, I think one of the sites I found suggested this is why network is required. You’ll see
shortly just how to configure NetworkManager and your virtual machines. For now, take a look
at these screen shots under "QEMU Virtial Networks" and understand that if you have been working with this interface, and you’re
frustrated you haven’t got the results you want, you should not be surprised.
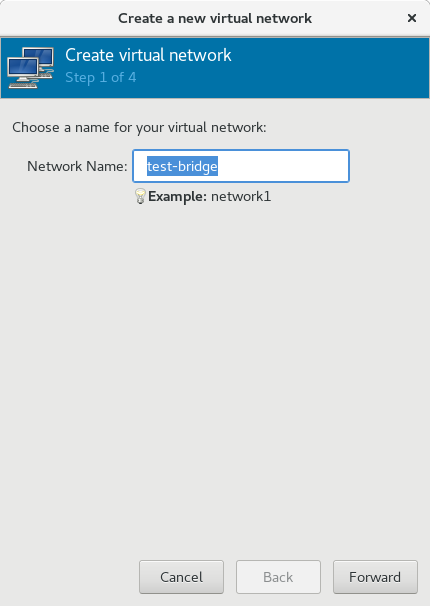
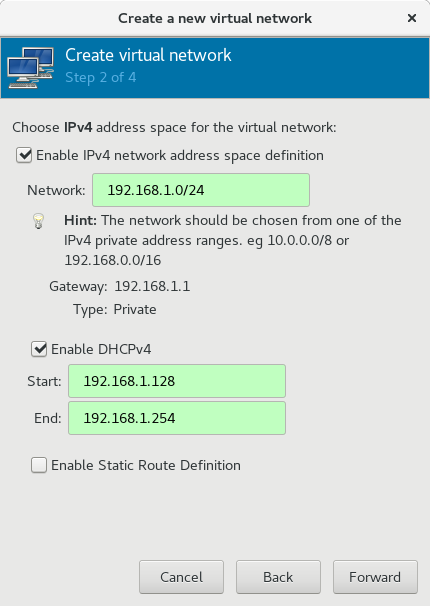
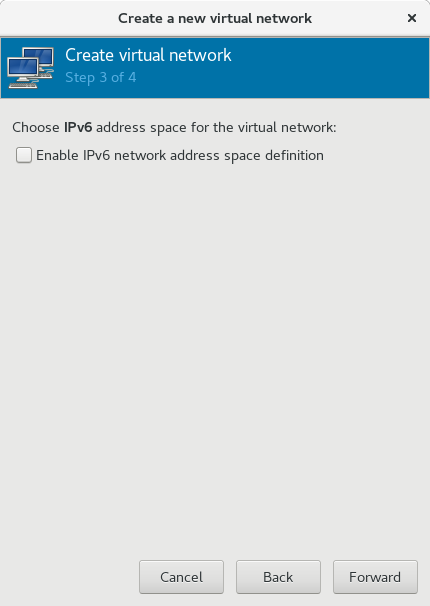
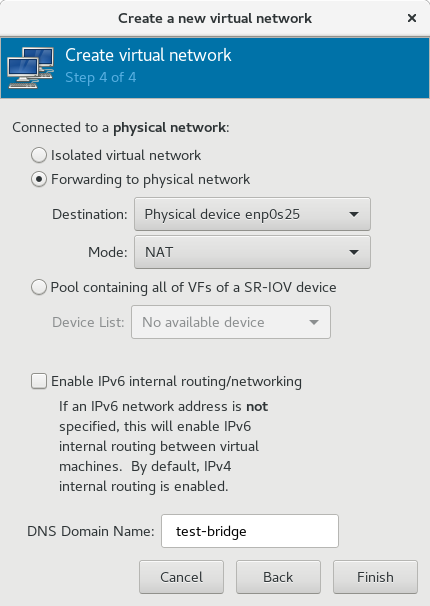
QEMU Virtual Networks
DO NOT use the virt-manager tool for creating bridged connections.
Virt-Manager > Edit > Connection Details
"Virtual Networks" Tab is somewhat misleading. You can create an isolated private network for just your VMs. This could be advantageous if you wanted to create a whole separate subnet just for your vms. All of them would be addressable through a NAT on your host machine. I did not want that.
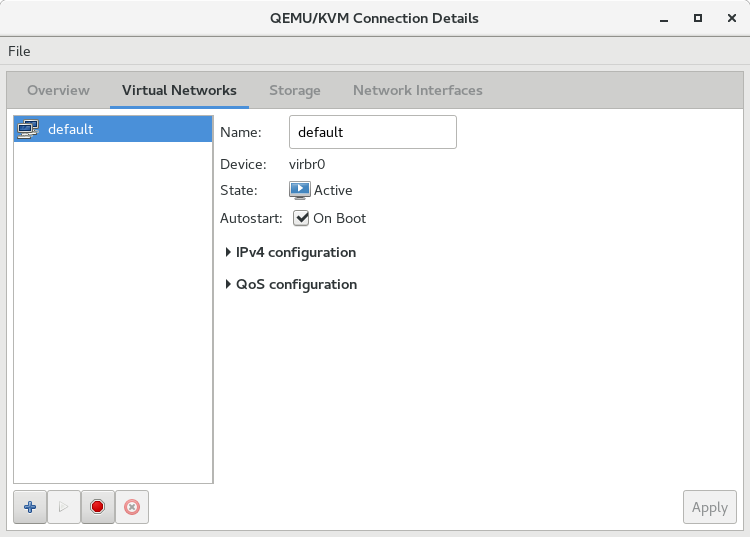
This is a suggested flow below for creating a NAT’d isolated network. It does not bridge the vm to the host subnet. The "Virtual Network Interface" settings on your vm profile used to suggest creating a "bridge" this way.
Overview: Configuration Approaches
Note that the GNOME GUI for managing network connections (gnome-control-center) for this version (?) of fedora is different as of fedora26 and RHEL 7.5. In the latter versions, the ability to create a bridge from the User Profile Network Manager (top right of your screen) is removed. You can use any of the three other examples below instead.
-
gnome-control-center (deprecated - feature removed)
-
nm-connection-editor
-
nmtui
-
nmcli
Using gnome-control-center GUI
You used to be able to build bridges from the gnome-control-panel. This is the "Settings" feature from the top right drop-down screen or from the "Settings" control panel.
$ gnome-control-center network
DO NOT EDIT YOUR NETWORK CONFIGURATION HERE
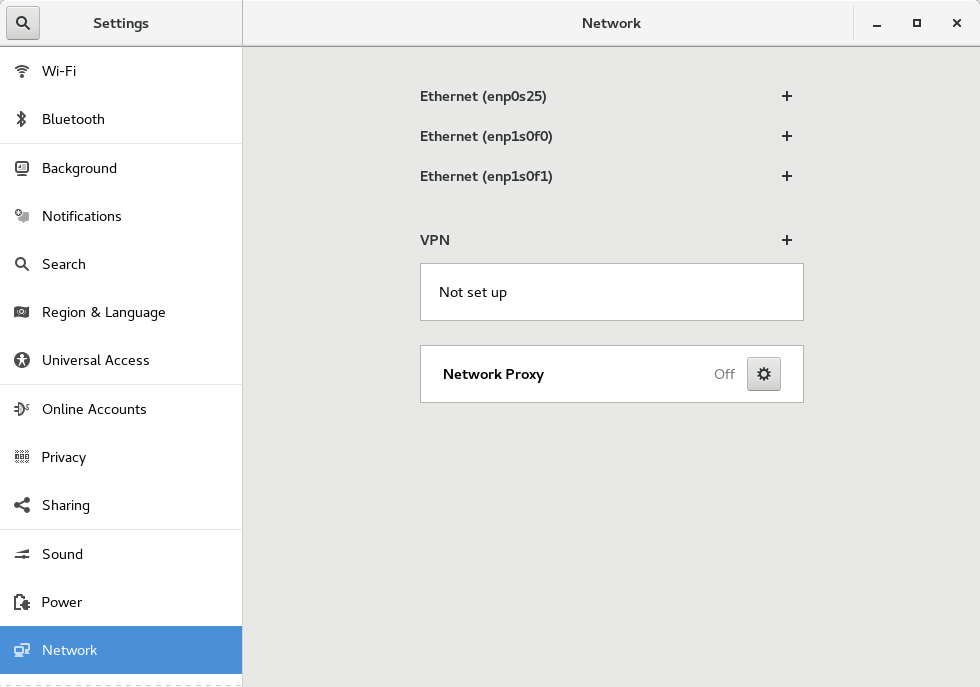
DO NOT EDIT YOUR NETWORK CONFIGURATION HERE
DO NOT EDIT YOUR NETWORK CONFIGURATION HERE
Using nm-connection-editor
Bring up nm-connection-editor from the terminal or any shortcut you may have.
$ nm-connection-editor
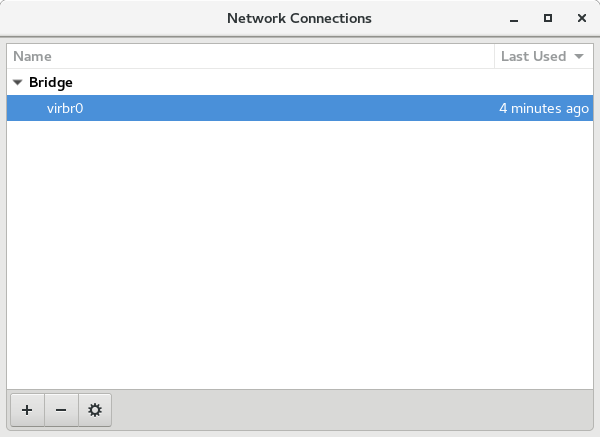
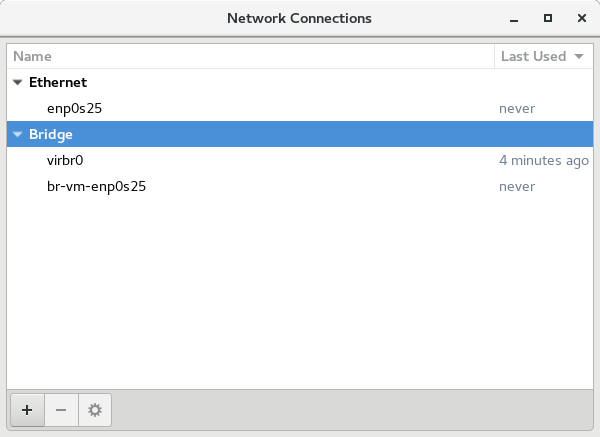
The dialog below shows I have not yet configured any typical ethernet network interface. However, it does show the default virt setup with a vibr0 bridge for creating completely isolated networks for your vms. We are not going to use it, but we will leave it in place for now.
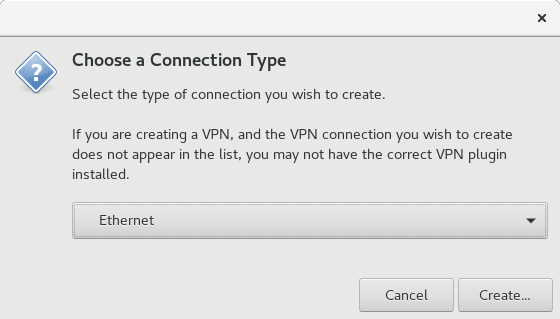
Click the "+" icon and up pops this dialog. Choose "Bridge" type. Sorry the image below just shows "Ethernet".
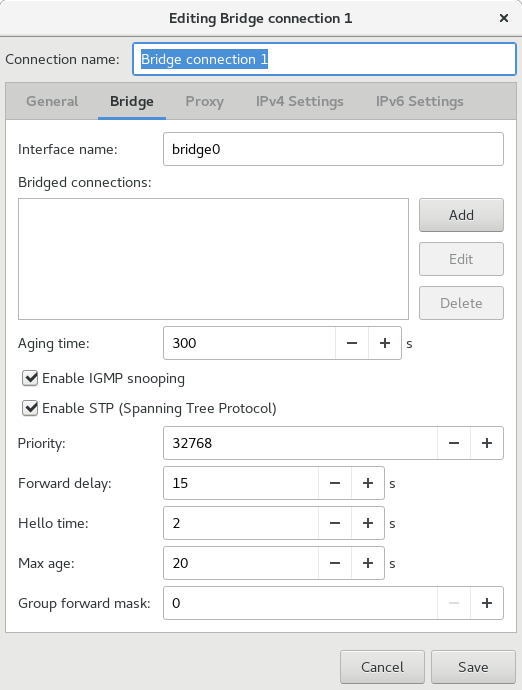
Rename your connection as desired. Note that there is a 15 character limit for "Connection Name". If you go past 15 characters, it will look ok in the user interface but the button to Save or Activate the profile will not be available. Notice here I tried naming my connection "bridge-vm-enp0s25" to logically identify what I am bridging. However, because it has too many characters, the "Save" button remains greyed-out.
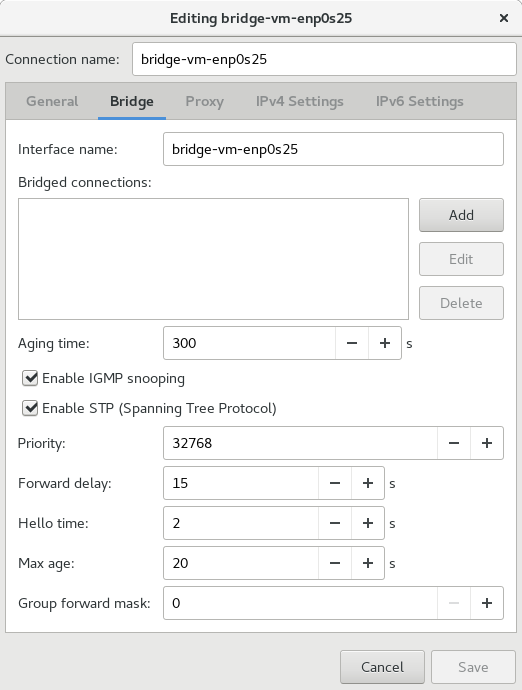
Here I used a shorter bridge name: "br-vm-enp0s25". Also, make your "Connection Name" and "Interface Name" match. It’s funny how such trivial problems from poor user interface translate into enormous amounts of wasted time and effort. I thought I was configuring something else incorrectly.
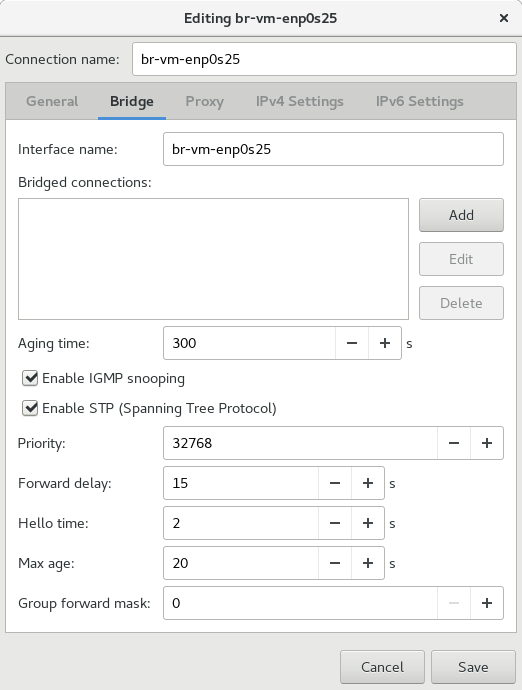
Click "Add" next to "Bridged Connections" to specific which device you want to source the bridge from. That is, what physical device or ethernet port is attached to the network you want the VMs to bridge to. In my case, I want "enp0s25".
Click "Ethernet" in the dialog box this time. Name this Connection after your network interface, then select the same network interface in the "Device" dropdown. Click Save.
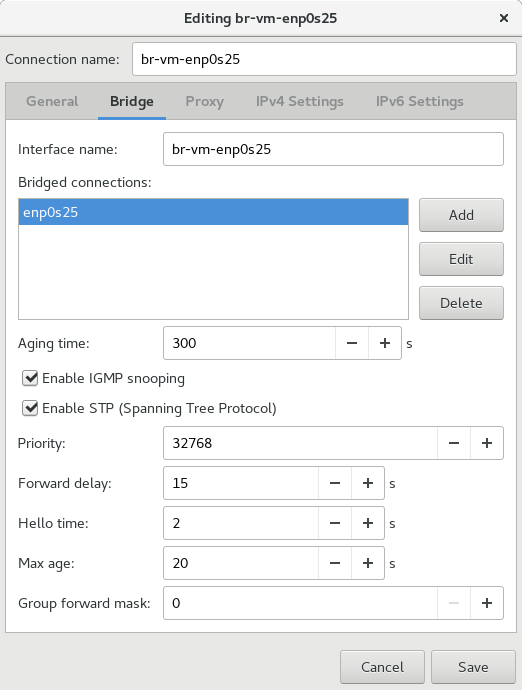
Now click "Save" and you should see the results similar to below.
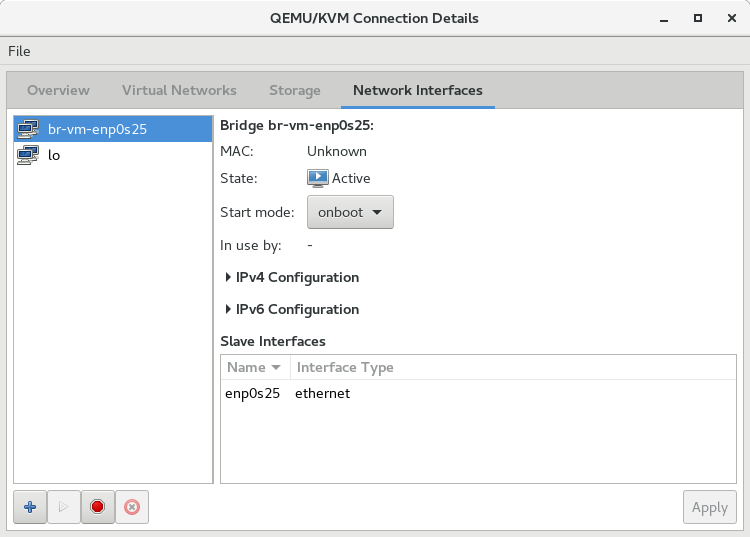
Now virt-manager go to Edit > Connection Detils > Network Interfaces.
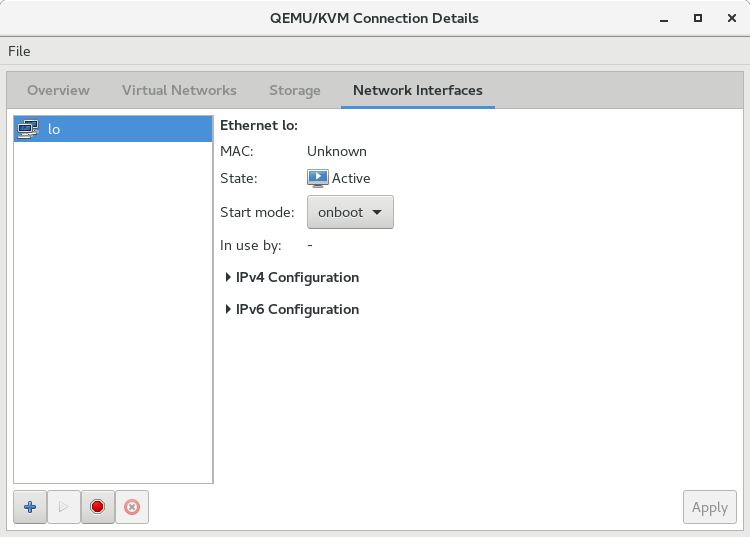
Click this "+" icon to add your bridge. It should show up here. If it does not, you may want to restart services or reboot the machine.
Now go to your vm in virt-manager. Double-Click on it to bring it up. Click on the light-bulb
icon to change its configuration. Click on the device labeled "NIC" and change "Network Source"
to match the bridge you just set up.
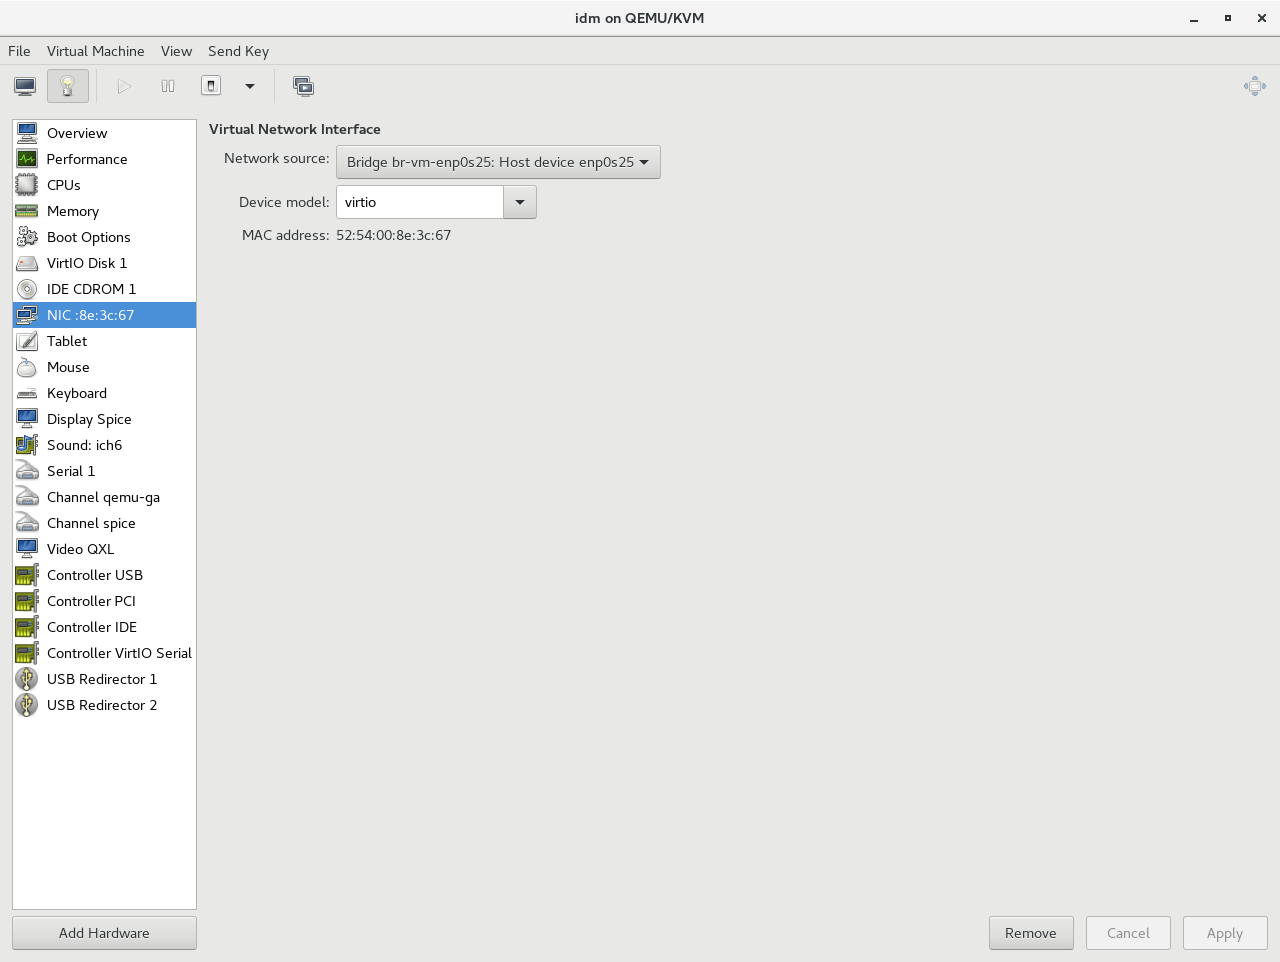
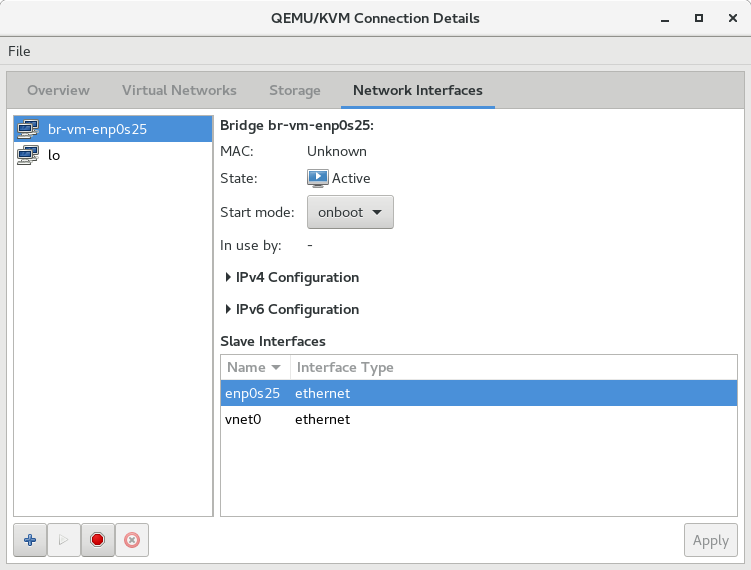
Note here that you will see a vnet0 get added as a slave interface automatically the next time everything starts and is working. This is required for things to work. See my debug note below.
Using nm-tui
This is intuitively the same as the GUI. If I have a chance to do screen shots one day I may update this. But as you see below the CLI option is very clean and simple.
Using nm-cli
Doing this on CLI is quite nice and clean. Bridge 192.168.1.2 on interface em1:
nmcli con add type bridge ifname br0 ip4 192.168.1.2/24 gw4 192.168.1.1 ipv4.dns 192.168.1.1 autoconnect yes ipv4.dns-search example.com
nmcli con modify em1 master bridge-br0 slave-type bridge
nmcli connection up em1
To see the details of the bridge:
nmcli con show bridge-br0
virsh iface-list --all
I migrated a kvm image from one host to another, following these instructions:
virsh dumpxml VMNAME > domxml.xml
And made sure the bridge was named correctly for the new host:
<interface type='bridge'>
  <mac address='52:54:00:8e:3c:67'/>
  <source bridge='br0'/>
  <model type='virtio'/>
  <address type='pci' domain='0x0000' bus='0x00' slot='0x03' function='0x0'/>
</interface>
Then installed the copied image on the new host with the new bridge:
virsh define domxml.xml
Debugging
Another alternative:
-
https://www.youtube.com/watch?v=8LnghnDv0LY (this one creates a routed private network)
I ran into this problem:
The vnet0 interface was actually brought up by virt-manager (virsh/kvm/quemu) specifically for this bridged connection. I deleted all network connections, then rebuilt the bridge. Upon restarting NetworkManager and then restarting libvirt (and all vms), vnet0 reappeared automatically and the bridge connection worked correctly.